Facebook Notifications and Twitter Update on Your Desktop

This is an old thing that need to update, one of my friend ask the old config for show facebook notifications on desktop with conky.
He gave me the config of conky and also the bash, because the old use it 🙂 i already had tried it before when facebook doesn’t get https by default, yes the one reason this script doesn’t work because facebook using HTTPS, the script just work on normal HTTP.

so what must we do?
1. You must get your notification RSS url.
2. Go here , may be you will ask to login.
rssfacebook


3. And you will see the RSS text, right click, copy the URL.
4. We need setup for conky, here i use 2 conky instance.
5. You can copy my facebook conky here, twitter conky here
6. Then you can see that u just copy your RSS url to the place i tell at the conkyrcfacebook
7. if you want to combine it to your own conky just try it.
8. Then save the conkyrcfacebook
9. run conky -c /place/to/your/conkyrcfacebook
10. or run conky -c /path/to/your/conkyrctwitter


conkyrctwitter

Posted in Uncategorized | Leave a comment

Make Custom .desktop files for Shortcut Do You Need

Simply you may need youw own custom shortcut to make your linux more efficient, this happen when i wanna launch warcraft3.exe using wine, why i must using terminal to run it?
Open terminal > type wine application-name.exe -opengl > then press “return”
Why that’s get be easier?
So this is my experiment :

1. touch ~/.local/share/applications/warcraft.desktop
2. nano ~/.local/share/applications/warcraft.desktop

fill like this :

[Desktop Entry]
Type=Application
Version=1.0
Name=Warcraft 3
Icon=icon warcraft maybe
Exec=wine warcraft3.exe -opengl
Terminal=false
Categories=Game;

3. then Ctrl+o untuk save, ctrl+x to exit.
4. Just that easy, you will see this shorcut on you game menu category.

Posted in Uncategorized | Leave a comment

VLC 2.0 No Skins Support

When i got an update vlc just upgraded to version 2.0, but there was a problem i like using the vlc skins that is make vlc look like a pro. But unexpectedly this arch update doesn’t support it. I don’t know what is the developer reason to compile VLC 2.0 without skin support, but that’s doesn’t matter now.

It’s solved man! The thing that do you need is recompile the VLC, here are some steps :
1. Download the source here
2. Extract the pack
3. Direct your terminal to the VLC extract folder
4. Use this to configure ./configure –enable-skins2 –enable-libtar then press return
5. Because the other option had been set by default by vlc itself, and we just need the skins2 to enabled.
6. type make then press return
7. If you already had vlc installation please remove it #pacman -R vlc
8. Back to your terminal and type sudo make install then press return

thanks to Ferdinand Holzner for his suggest 🙂

Posted in Uncategorized | Leave a comment

Chakra GNU/Linux 2012.02 Archimedes

Chakra is a desktop-centric, Linux distribution that was derived from Arch Linux, but is now a fork of that distribution. Unlike Arch Linux, which supports several desktop environments, Chakra is a KDE-only distribution.

The latest edition, Chakra 2012.02, code-named Archimedes, was released on February 12. Since there is very little difference, other than changes in software and kernel versions, between this latest release and Edn, the previous release, this article offers a summary review only. You may read the previous review here.

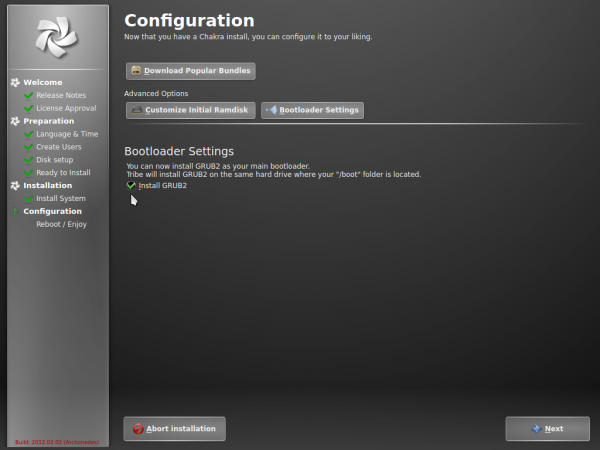
Tribe, Chakra’s graphical installation program, received one minor update in this release. That change pertains to the boot loader used. In previous releases, Chakra used BURG as the boot loader. For this release, the switch was made to GRUB 2, the boot loader that almost all Linux distribution use. So at the boot loader configuration step in the installation process (see screen shot below), you will see a reference to GRUB, instead of BURG. For those new to this, BURG (GRUB spelled backwards) is derived from GRUB.
Chakra Linux Tribe Bootloader GRUB

A default setting of Tribe that I think should be changed, is autologin. Though a convenience feature, autologin is generally bad for the physical security profile of your computer. There are situations when it is acceptable to enable it, but certainly not by default for every new installation. So for every new installation of Chakra that I perform, I always disable autologin at the step of the installation process shown below.
Chakra Linux Tribe Create User Autologin

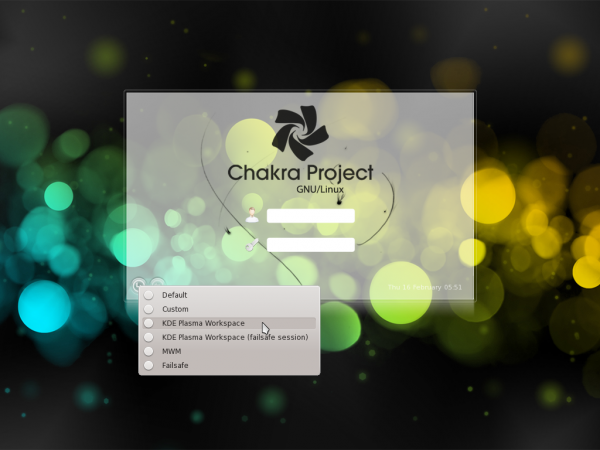
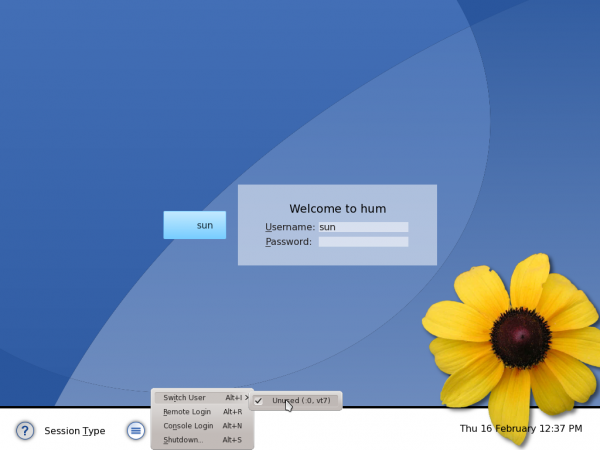
Ronak is the name of this release’s default theme, and I do not find it to be particularly visually appealing. I know that this is a minor issue, or not even an issue at all, but we need to be able to pick better themes and wallpapers than this, especially when much better ones are available. Like everything else, you can always change the login screen’s theme if the default does not appeal to you. You can see a screen shot of a modified login screen at the end of this article.
Chakra Linux Archimedes Login Screen

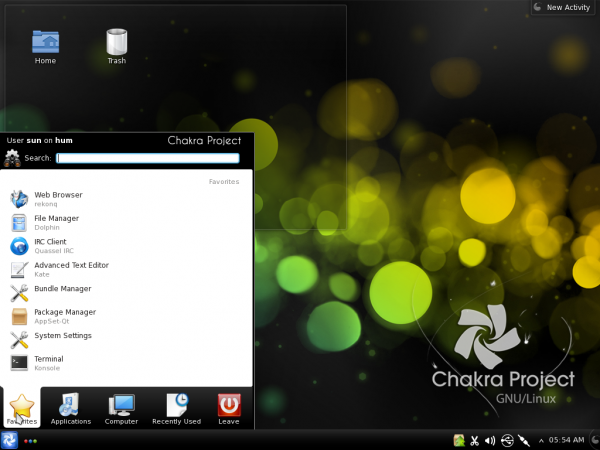
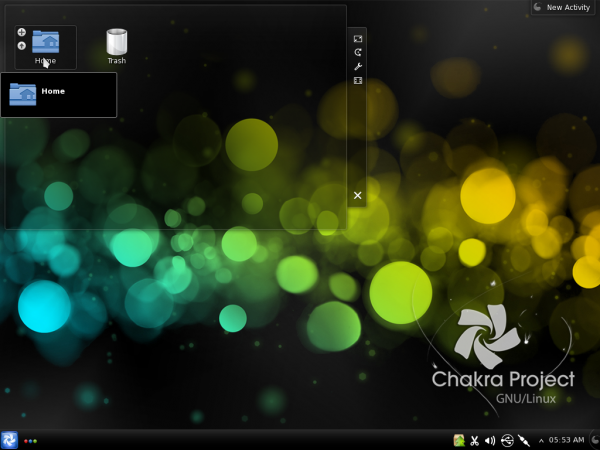
Chakra’s desktop is powered by KDE 4.8, the latest stable release of the K Desktop Environment. The default desktop is shown in the screen shot below. The Kickoff menu, which is the default on Chakra, has been tweaked to make it less onerous to use, but I still think the tweak has not done enough. The search feature is its only saving grace.
Chakra Linux Archimedes Desktop Kickoff

Given that I am not a fan of the Kickoff menu, the first thing I always do on any installation of Chakra, even on test systems, is to install the Takeoff Launcher, then configure it as much as I want. I like beautiful graphics, and I especially like the fact that Takeoff Launcher can be made to look as good as you want it to. Its only major shortcoming is that it has no search feature, but with KRunner, you do not really need an integrated search feature, though it would be a lot better if a KRunner-type feature is built-in. So this is how my Chakra Linux desktop looks like, both in the Virtualbox installation and the real hardware installation.

By the way, KRunner is the search feature you see peeking out from the top of the desktop in this image. It provides the same functionality as AppMenu-Qt, and it is integrated into KDE by default. To activate it, hold down the Alt key, then press the F2 key. It is really cool.
Chakra Linux Archimedes Desktop Takeoff Launcher

One of the most perplexing things about some desktop distributions, is the refusal of their developers to make the most basic service that virtually all users will at some point use, to just work out of the box. Take printing, for example. On other distributions that use the K Desktop Environment, like Sabayon, Pardus and Linux Mint KDE, any connected printer with a compatible entry in the printer database is automatically configured. Not on Chakra Linux.

Though the cups package is installed, cups, the printing daemon, is not even running. So, if you are new to how Chakra works, you first have to figure out how to enable cups. Not a difficult process, by the way, but you have to go read the wiki. After cups is running, printer configuration is not even automatic: You have to add the printer manually. Compare that to the way the other distributions I mentioned above handle printer configuration. Other aspects being equal, which would you rather use?

There were more than 100,000 downloads of Edn, the previous release of Chakra. Assume about the same number for Archimedes. Now imagine half of those users trying to figure out how to configure a printer. That is time that could have been spent getting other stuff done – if one person, one developer, had taken just a few minutes to set up a very basic service, so that it just works – out of the box. And this is 2012, not 1990s and early 2000s when getting most hardware to work in Linux meant messing with a configuration file.

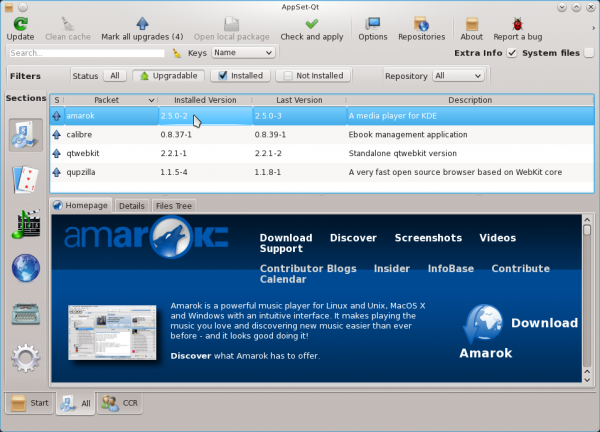
AppSet-Qt, Chakra’s graphical package manager, works quite well. At the time of publishing this review, only six updates (shown in the image below) have been released. Updating and package installation is a breeze.
Chakra Archimedes Update Manager

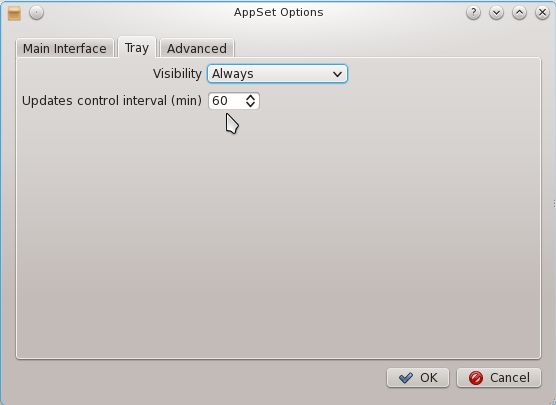
An adjustment you might have to make to the package manager, is the updates checking interval. By default, the system is configured to check for updates every hour. Most distributions go for once per day, but this is a matter of choice.
Chakra Archimedes Update Interval


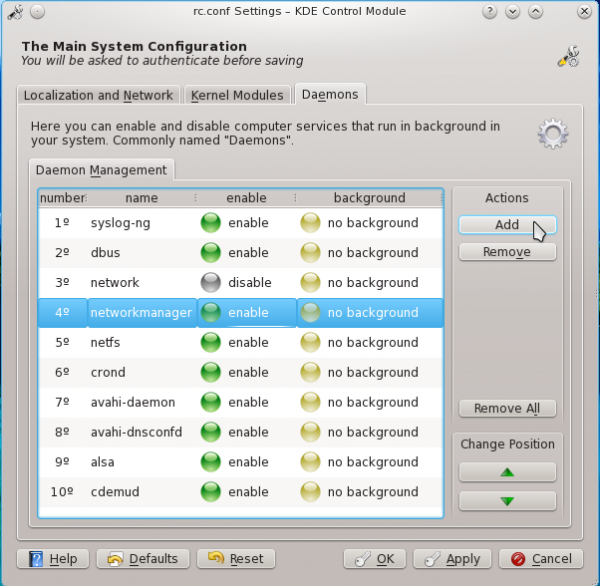
Most of the graphical management applications that you would need for managing the system, are accessible from System Settings (Menu > Favorites > System Settings). A few are in Menu > Favorites, Menu > Applications > Utilities, and Menu > Applications > System. Most are the same management applications that you will find on any KDE desktop. The only one I will draw attention to here is not even installed. It is called rcconf-settings, and is the graphical interface to rc.conf, Chakra’s main configuration file. Though it is very easy to use for managing daemons, system locale and kernel modules, its main drawback is that after adding a service or kernel module, the system has to be rebooted before changes take effect.

So, for example, adding the cups or sshd service using this application entails restarting the machine. That is a major disadvantage. This is probably why it is not installed and not even mentioned anywhere in the official documentation page, except on a Live System 2011.04 feature plan. This screen shot shows a list of services or daemons in its Daemon tab.
Chakra rcconf-settings

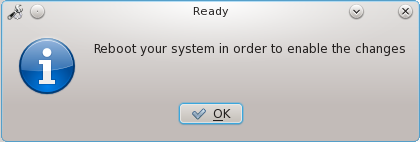
Just to show the system message after making a change to the system using rcconf-settings. Besides Tribe, I think this is one application that needs some attention from the developers.
Apply Rcconf-Settings Changes

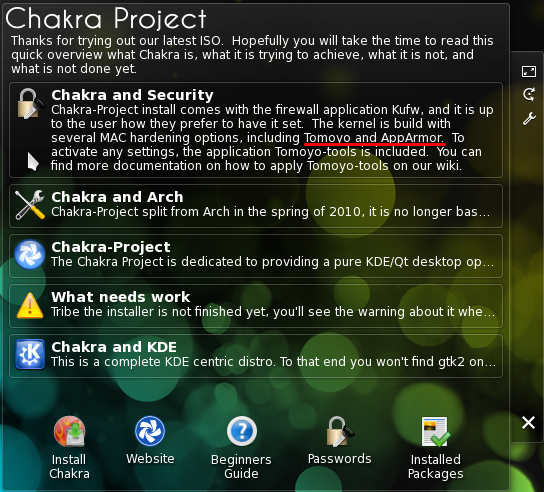
With regards to security, the Release Notes states that Tomoyo-tools, a security application similar to SELinux, is in the default install, which is true, but the notes on the Live CD/DVD desktop states that AppArmor is also in the default install, which is not true, because userland AppArmor utilities are not even in the repository. And in keeping with the projects policy of installing a graphical firewall application and leaving it to the “user how they prefer to have it set,” Kufw, a graphical interface for UFW, the UnComplicated Firewall, is installed but not configured. I made a good case for why this is not a good stance, in why your computer needs a firewall enabled.
Chakra Linux Live Desktop Security Info

The philosophical stance of some distro developers, tend to pose an unnecessary barrier to the distribution’s adoption. Because given a choice between using a distro that just works out of the box, and another that requires you to get your “hands dirty” before the most basic stuff works, I think many will opt for the former. But Chakra is not as bad as, say, Debian in this regard, because the steps you need to take to get it to how you want it to work, is not that difficult.

Resources:: There is a CD and a DVD ISO installation image of Chakra Linux 2012.02 for 32- and 64-bit platforms available for download here. A system installed using a DVD image comes with a lot more applications out of the box, so you are going to hit the ground running, if you download a DVD installation image.

Scree Shots:: More screen shots from test installations of Chakra Linux 2012.02 Archimedes

A screen shot of the modified login screen. This is much better than the default – to me at least.
Chakra Linux Archimedes KDE Login Screen

Chakra’s default desktop.
Chakra Linux Archimedes KDE Desktop

Another screen shot of a modified desktop, using the Takeoff Launcher as menu, instead of the default Kickoff menu. Yep, that is an image of a model behind the menu.
Chakra Linux Archimedes Desktop Takeoff Girl

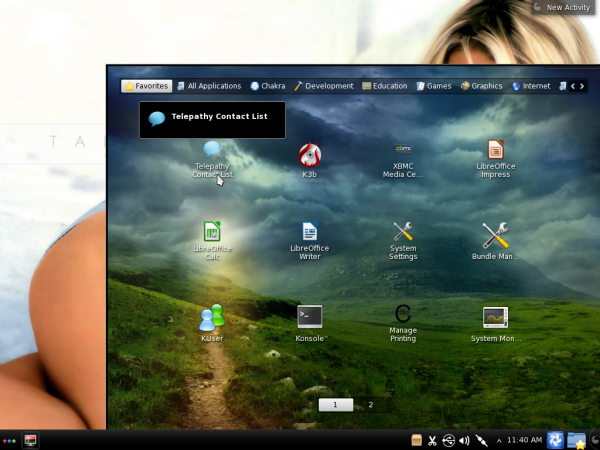
The main interface of Chakra’s KDE Plasma Netbook desktop
Chakra Linux Archimedes Desktop Netbook

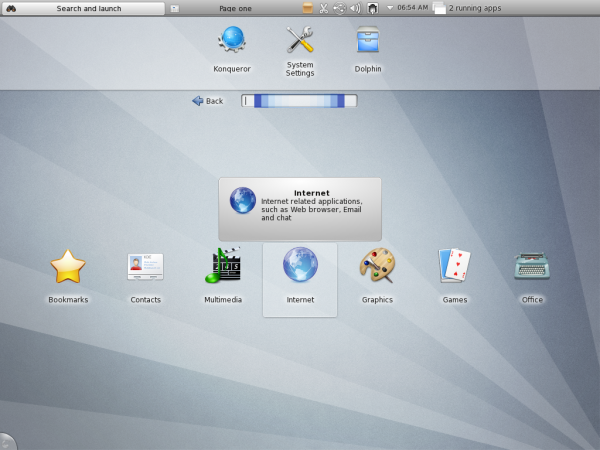
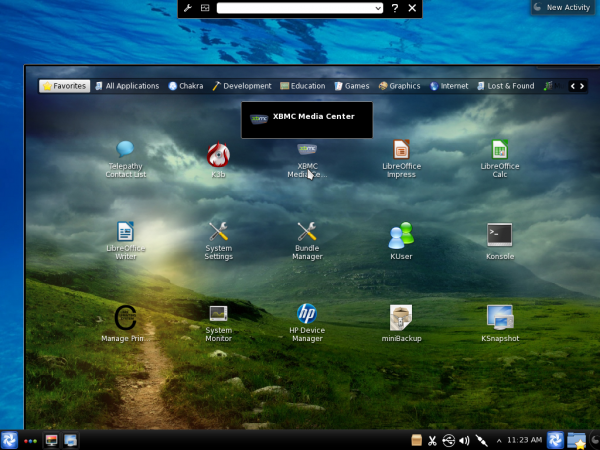
Installed Internet applications as seen from Chakra’s KDE Plasma Netbook desktop.
Chakra Linux Archimedes Desktop Netbook App

Like Sabayon, Chakra comes with XBMC, a media center application, installed by default. This screen shot shows the weather module of XBMC.
XBMC Chakra Linux Archimedes

Posted in Uncategorized | Leave a comment

Learn Astronomy from Your Desktop

Many people’s initial exposure to science is through astronomy, and they are inspired by that first look through a telescope or their first glimpse of a Hubble image. Several software packages are available for the Linux desktop that allow users to enjoy their love of the stars. I look at several packages in this article that should be available for most distributions.

The first is Stellarium, my personal favorite for day-to-day stargazing. When you install it, you get a thorough star catalog. By default, Stellarium starts up in full-screen mode. The layout makes for a very attractive display of the sky above you, and almost all the details of the display are customizable.

Figure 1. Opening Stellarium gives you a look at the local sky.

If you hover your mouse pointer over either the bottom-left border or the lower-left-side border, one of two configuration panels appears. From here, you can set visual items, such as constellation outlines, constellation names, whether galaxies and nebulae are visible, as well as a coordinate grid. You also can set location and time values. This means you not only can see what the sky looked like in the past or what it will look like in the future, but you also can see what it looks like on the other side of the planet. Additionally, you can add even more stars to the catalog that Stellarium uses.

Figure 2. You can set the time so it’s later, letting you check out what you might want to look for that evening.

Figure 3. The configuration window lets you download even more star catalogs.

Stellarium includes a script capability. With it, you can script views of starfields and share them with others. When you install Stellarium, you get several demo scripts to use as examples. As of version 0.10.1, there is a new scripting engine based on the Qt scripting engine. A full API is available, allowing you to interact with all of the functions that Stellarium provides. It is a full scripting language called ECMAscript. You may know it better as JavaScript. You can define your own functions, encapsulating larger chunks of work. There is a for statement, providing a loop structure that will look familiar to C and Java programmers.

To access and run scripts in Stellarium, you need to open the configuration window and click on the scripts tab. Once you’ve written your own scripts and want to run them, you can place them in the scripts subdirectory of the user data directory. On Linux machines, the user data directory is $HOME/.stellarium. Once you put your script files there, along with any textures they may require, they will show up within the list of scripts in the configuration window. A plugin architecture also is available, but it is much harder to use, and the API varies from version to version.

The nice thing about Stellarium is that it isn’t limited to your computer. It can interact with the real world in a couple ways. The first is through telescope control. Stellarium provides two different mechanisms for controlling your telescope. The older mechanism is a client-server model. The server runs as a standalone application that connects to and controls one telescope. It then can listen to one or more clients, which can include Stellarium. Several options are available for the server portion, and they provide control for many telescopes from Meade, Celestron and others. The second mechanism is a plugin for Stellarium, which first was available in version 0.10.3. This mechanism can send only slew instructions to the telescope, which essentially are “go to” instructions.

One major warning is that Stellarium will not stop you from slewing to the sun. This could damage both eyes and equipment if you don’t have proper filters on your telescope, so always be careful if you are working during the day.

The plugin can interact with pretty much any telescope that understands either the Meade LX200 interface or the Celestron NexStar interface.

The other way Stellarium can interact with the real world is as a planetarium. Stellarium can handle the calculations involved in projecting over a sphere. This way, you can make a DIY planetarium. You need a dome onto which you can project your display across the inside. You also need a video projector and a spherical security mirror. Use the spherical distortion feature in Stellarium and then project the results through the video projector and onto the mirror. Then, you can lie back under the dome and see the sky above you. The Stellarium Web site has links to groups on the Internet where you can find help and hints when building your own planetarium.

The other popular astronomy program is Celestia. Celestia is a three-dimensional simulation of the universe. Where most astronomy software shows you what the sky looks like from the surface of the Earth, Celestia can show you what the sky looks like from anywhere in the solar system.

Figure 4. When you first open Celestia, you get a satellite-eye view of the Earth.

 Celestia has a powerful scripting engine that allows you to produce tours of the universe. When you install Celestia, you get a script called demo.cel that gives you an idea of its capabilities. The add-on section of the Celestia Web site includes a full repository of available scripts.

Because so much work has been done to make it as scientifically accurate as possible, it also is being used in educational environments. Currently, 12 journeys are available that provide information for students and the general public on the wonders of the universe. As opposed to scripts, journeys give you more control over your speed and pace, allowing you to take more time at the areas that are of most interest to you.

When you install Celestia, you get the core part of the program and a few extra add-ons. Currently, more than 500 add-ons are available, and if you install them all, you will need more than 18GB of drive space. The main repository you should check out first is located at http://www.celestiamotherlode.net.

If you want to travel to another planet in the solar system, you can click on Navigation→Go to Object. Here you can enter the name of the object and how far away you want to be. Then, click on Go To, and you’ll be taken there directly. Once you’re there, you can rotate your camera view with the arrow keys. In this way, you can go to Mars and turn around and see what the sky looks like from there.

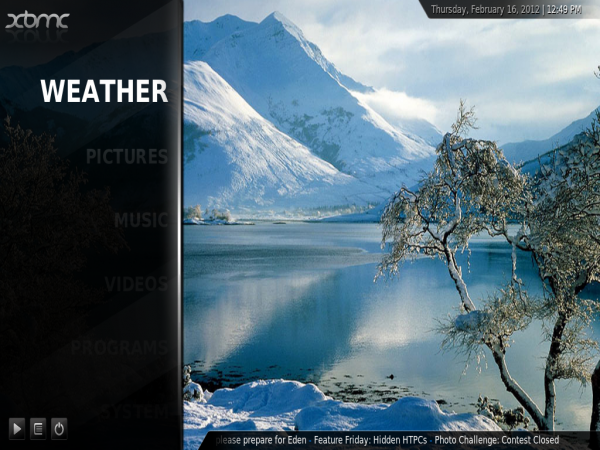
Figure 5. When you want to go to an object, you can set what object you want go to and how far away you are.

Figure 6. You can zoom in to see the Great Red Spot on Jupiter.

Figure 7. You can look out and see the night sky on Mars.

If you want to move around the orbit of the body you’re currently at, you can use the Shift and arrow keys to slide around and see the whole surface. What you see when you are in orbit around another planet is a texture mapped onto the body.

Celestia’s core installation includes a minimal set of textures that strive to be as accurate as possible. You can change the textures being used by including add-ons from the repository. Some of these include textures that allow you to see what the Earth may have looked like during the last Ice Age or even four billion years ago.

In 2007, Vincent Giangiulio created an add-on called Lua Edu Tools. This add-on provides all kinds of extra functionality to Celestia. A toolkit is displayed on the right side of the screen that provides sliders for controlling many of Celestia’s parameters. It also provides a “cockpit” overlay, making it feel even more like you’re flying through space. The default texture is the space shuttle, but you can use other ones too. Celestia also lets you use a joystick to control movement, so you can immerse yourself completely into your dream of flying through space.

You can share your experiences with others by saving still images or movies. If you click on File→Capture Image, Celestia lets you save a PNG or JPEG image file. Clicking on File→Capture Movie lets you save a movie of your travels. You can set the aspect ratio, the frame rate and the video quality. Once you click Save, Celestia will be ready to start recording. When you are ready, click the F11 key to start recording. When you’re done, you can stop recording by clicking F12.

This article is only an introduction to what you can do. Hopefully, it inspires you to go explore the universe on your desktop. From there, bundle up and go spend the night out under the skies. You won’t regret it.

credit : LinuxToday

Posted in Uncategorized | Leave a comment

VLC 2.0 Released

VLC 2.0 “Twoflower” is a major new version of our popular media player.

With faster decoding on multi-core, GPU, and mobile hardware and the ability to open more formats, notably professional, HD and 10bits codecs, 2.0 is a major upgrade for VLC.

Twoflower has a new rendering pipeline for video, with higher quality subtitles, and new video filters to enhance your videos.
It supports many new devices and BluRay Discs (experimental).
Completely reworked Mac and Web interfaces and improvements in the other interfaces make VLC easier than ever to use.
Twoflower fixes several hundreds of bugs, in more than 7000 commits from 160 volunteers.

Features

VIDEO
  • Rewritten video output core and modules, allowing subpicture blending in GPU.
  • Shader support in the OpenGL output, for colorspace conversion, including 10bits.
  • New video outputs for Windows 7, Android, iOS and OS/2.
  • New debanding, grain, denoising and anti-flickering filters.
  • New deinterlacing filter, including an Inverse Telecine algorithm.
AUDIO
  • New resamplers for higher quality audio.
  • New dynamic range compressor and karaoke filters.
  • Simplification of the audio core for faster processing.
  • New audio outputs for iOS, Android and OS/2.
FORMATS
  • Multi-threaded decoding for H.264, MPEG-4/Xvid and WebM.
  • Support for 10bits codecs, WMV image and some other codecs.
  • Rewritten support for images, including jpeg, png, xcf, bmp…
  • Important changes in RealVideo and Real Format support.
  • CrystalHD cards and Android OpenMAX support for hardware decoding.
INPUT AND DEVICES
  • Experimental support for BluRay discs:
    – Menus are deactivated in this release (will come soon).
    – AACS and BD+ DRM libraries and keys are not shipped, for legal reasons.
  • Support for SDI capture cards and QTKit devices.
  • Support for new adaptive streaming protocols, like HLS and DASH.
FOR MAC USERS
  • Completely new, single window interface:
    – Available in 2 colors: Lion grey and QTX black.
    – Extensions support and better Lion integration.
  • Support for all QTKit devices through qtcapture and qtsound modules.
  • Continued support for X 10.5 and PPC users (1080p and ProRes on Dual-G5!).
FOR ANIME FANS
  • Vastly improved MKV demuxer.
  • Rewritten linked segments and ordered chapter files support.
  • Correct support for FLAC, RV and Hi10p in MKV.
  • Rewritten seeking support in cue files.
  • Various ASS subtitles improvements.
FOR PROFESSIONAL USERS
  • Support for ProRes 422 and 4444, AVC/Intra.
  • Support for Jpeg-2000 and DNxHD/VC-3 in 10bits.
  • Support for EBU subtitles (stl) and EIA-608.
  • SDI and HD-SDI card support for input on Linux.
  • New Dirac/VC-2 encoder, faster than the previous one.
FOR DEVELOPERS
  • libVLC, libVLCcore and libcompat have switched from GPL to LGPLv2.1+.
  • New libVLC examples are available: media player, photobooth and mediainfo clones.
  • New JSON requests on the web interface to control running VLC instances.
  • Implementation of the MPRIS2 interface to control media players.
  • VLC’s web plugins have been rewritten for better integration and stability in all browsers.

Screenshots

VLC media player - Mac OS X 10.6
VLC media player - Gnome 3 on Debian
VLC media player - Windows 6
VLC media player - Gnome 2 on Mandriva
VLC media player - Mac OS X.6
VLC media player - Gnome 3
 if you are run linux, this may be had been updated to your repository…
just update your system…
credits : VideoLAN.org 
Posted in Uncategorized | Leave a comment

Windows 8 Logo

It’s a window… not a flag

if you look back to the origins of the logo you see that it really was meant to be a window. “Windows” really is a beautiful metaphor for computing and with the new logo we wanted to celebrate the idea of a window, in perspective. Microsoft and Windows are all about putting technology in people’s hands to empower them to find their own perspectives. And that is what the new logo was meant to be. We did less of a re-design and more to return it to its original meaning and bringing Windows back to its roots – reimagining the Windows logo as just that – a window.

winlogo-history3-thumb

Let’s look back at a few of the versions along the way.

Windows 1.0

Few remember the original Windows logo, yet we found it both refreshing and inspiring in relation to the work we have been doing on the Metro style design visuals. Using simple lines and clear straight forward concept, this logo reminded us of what a great and evocative name we have with “windows”.

2

Windows 3.1

For many of us this was the image in our mind when we think of past Windows logos. The now classic window shape and the introduction of the four colors were hallmarks of the Windows brand for many years to come. The introduction of the “waving effect” gives the logo a sense of motion. This logo would be the basis of the Windows versions throughout the 1990s.

3

Windows XP

The next major incarnation of the logo came with the release of Windows XP. What has come to be known as the “Windows flag” is a cleaner more sophisticated mark than its predecessors. The version that populated the lower left hand corner of Windows PCs next to the word “Start” also gained a sense of materiality (plastic?) and a 3D effect from the rich gradients and shadows.

4

Windows Vista

The Windows Vista release marked the beginning of the AERO design aesthetic in Windows with a key component of the interface being the “AERO glass” effect. Replacing the green Start button was the round glass-like button with a now flattened version of the “flag” from Windows XP. Internally, this icon became known as the “pearl”. You can see the intricate lighting effects of the faux glass. In many ways signaling just how powerful of a rendering engine the PC had become. This version of the logo was largely unchanged for Windows 7.

5

Windows 8

With Windows 8, we approached the logo redesign with a few key goals on mind.

1. We wanted the new logo to be both modern and classic by echoing the International Typographic Style (or Swiss design) that has been a great influence on our Metro style design philosophy. Using bold flat colors and clean lines and shapes, the new logo has the characteristics of way-finding design systems seen in airports and subways.

2. It was important that the new logo carries our Metro principle of being “Authentically Digital”. By that, we mean it does not try to emulate faux-industrial design characteristics such as materiality (glass, wood, plastic, etc.). It has motion – aligning with the fast and fluid style you’ll find throughout Windows 8.

3. Our final goal was for the new logo to be humble, yet confident. Welcoming you in with a slight tilt in perspective and when you change your color, the logo changes to reflect you. It is a “Personal” Computer after all.

Win8Logo_01_thumb

Redesigning the Windows Logo.

Posted in Uncategorized | Leave a comment

Ubuntu 10.04.4 Released

The fourth and final maintenance release of Ubuntu 10.04 is now available to download. 

Ubuntu 10.04 will continue to be supported with updates and security fixes until April 2013 but 10.04.4 marks the the last update to ‘installation media’.

“For the first time, this point release includes backported updated hardware support,” Canonical’s Kate Stewart states in the release announcement.

“In addition, numerous post-release updates have been integrated, and a number of bugs in the installation system have been corrected. These include security updates and corrections for other high-impact bugs, with a focus on maintaining stability and compatibility with Ubuntu 10.04 LTS.”

Amongst the updates present in 10.04.4 is the addition of the VMWare View Client for installation, update translations for the Ubuntu installer, and security updates for Firefox.

A change-log containing full security and bug fix details can be found online @ wiki.ubuntu.com/LucidLynx/ReleaseNotes/ChangeSummary/10.04.4

melaluiUbuntu 10.04.4 Released.

Posted in Uncategorized | Leave a comment

A Cloud Computing

Cloud Computing Explained

In cloud computing, the word “cloud” (also phrased as “the cloud”) is used as a metaphor for “the Internet,” so the phrase cloud computing means a type of Internet-based computing, where different services (such as servers, storage and applications) are delivered to an organization’s computers and devices through the Internet.

Cloud computing is an on-demand service that is obtaining mass appeal in corporate data centers. The cloud enables the data center to operate like the Internet and computing resources to be accessed and shared as virtual resources in a secure and scalable manner.

In its most simple description, cloud computing is taking services (“cloud services”) and moving them outside an organizations firewall on shared systems. Applications and services are accessed via the Web, instead of your hard drive. In cloud computing, the services that are delivered and used over the Internet are paid for by cloud customers — typically on an “as-needed, pay-per-use” business model. The cloud infrastructure is also maintained by the cloud provider, not the individual cloud customers.

Cloud computing networks are large groups of servers and Cloud service providers usually take advantage of low-cost consumer PC technology, with specialized connections to spread data-processing chores across them. This shared IT infrastructure contains large pools of systems that are linked together. Often, virtualization techniques are used to maximize the power of cloud computing. Currently, the standards for connecting the computer systems and the software needed to make cloud computing work are not fully defined at present time, leaving many companies to define their own cloud computing technologies.
Public Cloud Versus Private Cloud Explained

Cloud computing denotes a cloud computing platform that is outside of an organizations’ firewall on shared systems. In this scenario, your cloud provider is in control of the infrastructure. In contrast, a private cloud is the same platform; however it is implemented within the corporate firewall, under the control of the organization’s IT department.

A private cloud is designed to offer the same features and benefits of cloud systems, but removes a number of objections to the cloud computing model including control over enterprise and customer data, worries about security, and issues connected to regulatory compliance.
Other Meanings of the Phrase ‘Cloud Computing’

There are many people out there who believe the term cloud computing is just another buzzword that is used to describe too many technologies, making it confusing to many. The term Cloud computing has been used to mean grid computing, utility computing, software as a service, Internet-based applications, autonomic computing, peer-to-peer computing and remote processing. When most people use the term, they may have one of these ideas in mind, but the listener might be thinking about something else.
Cloud Computing Defined: A Dictionary of Cloud Terms
Cloud App

Short for cloud application, cloud app is the phrase used to describe a software application that is never installed on a local computer. Instead, it is accessed via the Internet. (Read the full definition)
Cloud Computing

A type of computing, comparable to grid computing that relies on sharing computing resources rather than having local servers or personal devices to handle applications. The goal of cloud computing is to apply traditional supercomputing, or high-performance computing power, normally used by military and research facilities, to perform tens of trillions of computations per second, in consumer-oriented applications such as financial portfolios or even to deliver personalized information, or power immersive computer games. (Read the full definition)
Cloud Enablement

The process of making available one or more of the following services and infrastructures to create a public cloud computing environment:
Cloud Management

Software and technologies designed for operating and monitoring the applications, data and services residing in the cloud. Cloud management tools help ensure a company’s cloud computing-based resources are working optimally and properly interacting with users and other services. (Read the full definition)
Cloud Migration

The process of transitioning all or part of a company’s data, applications and services from on-site premises behind the firewall to the cloud, where the information can be provided over the Internet on an on-demand basis. (Read the full definition)
Cloud OS

A phrase frequently used in place of Platform as a Service (PaaS) to denote an association to cloud computing.
Cloud Provider

A service provider who offers customers storage or software solutions available via a public network, usually the Internet. (Read the full definition)
Cloud Provisioning

The deployment of a company’s cloud computing strategy, which typically first involves selecting which applications and services will reside in the public cloud and which will remain on site behind the firewall or in the private cloud. Cloud provisioning also entails developing the processes for interfacing with the cloud’s applications and services as well as auditing and monitoring who accesses and utilizes the resources. (Read the full definition)

credits : http://www.webopedia.com/quick_ref/cloud_computing.asp

Posted in Uncategorized | Leave a comment

Standalone Compiz Archlinux

update from http://archlinux.web.id/?p=171

1.  sudo pacman -Syu
2. sudo pacman -S compiz (then select what do you need, also you may select the compiz-core first, then install another plugins later)
3. after that may take a simple browse to make your desktop environment set, for example “panel, keybinding, software set, or another things which fit your compute style”
4. this is critical things
5. touch ~/.compiz-start.sh
6. chmod +x ~/.compiz-start.sh
7. nano ~/.compiz-start.sh (fill with application do you need to start (example))
8. nano ~/.xinitrc (example)

that is, then you can start with “startx command” when you on terminal 🙂

Posted in Uncategorized | Leave a comment